Case Study 1: Total Talus with Tibia Replacement
A 71-year-old female presented to the office complaining of right ankle and hindfoot pain. She has been dealing with this issue that has been progressively getting worse over several years. She was treated in the past with bracing, injections and activity modification without relief. In addition, she has a contralateral ankle replacement and is very pleased with that. She wants to avoid a fusion of her ankle if at all possible. The patient was extensively consulted on surgical intervention including a gastrocnemius recession, harvest autogenous bone from the proximal tibia, talectomy, custom talar replacement, realignment and fusion of the subtalar joint, tibial replacement of the ankle joint and Brostrom procedure.
Pre-operative X-rays:
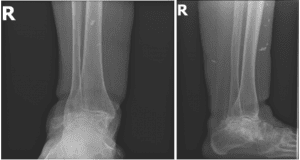
Pre-operative AP and Lateral weightbearing radiographs. Note the severe ankle and subtalar joint arthritis as well as the valgus position of the calcaneus.
CT & MRI Images:
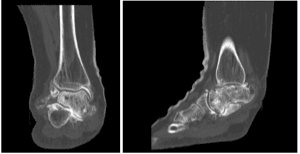
CT Scan demonstrating severe arthritis in the ankle and subtalar joint with collapse and fragmentation of the talus. Note the valgus position of the calcaneus as well.
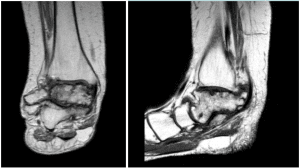
MRI demonstrating avascular necrosis (AVN) with collapse of the talus.
Pre-operative Planning:
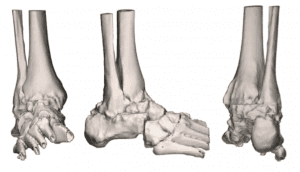
Pre-operative Planning based on CT scan demonstrating the patient’s anatomy. Note the severe degeneration of the ankle and subtalar joint as well as the valgus position of the calcaneus.
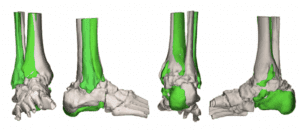
Repositioned anatomy noted in green.
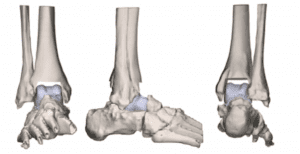
Proposed Total Talus implant
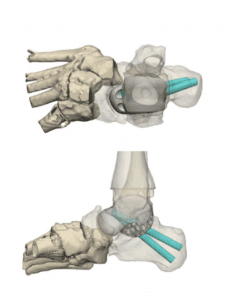
Superior (left) and Lateral view (right) of Proposed Custom Talar Implant. Note the inferior aspect of the Talar Implant is dome shaped for rotation of the calcaneus back under the talus to correct the valgus deformity. Screw placement (teal color) is built into the custom talus for fusion of the subtalar joint.
Intraoperative Images:
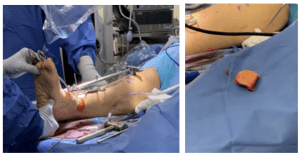
After the proximal tibial bone graft harvest and gastrocneiums recession was performed the extramedullary jig for the tibia component was aligned appropriately (left) and the distal tibial bone cut was made. The distal tibia cut was removed in one piece (right).
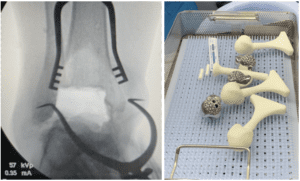
The talus was then removed completely and the different talar trial sizers were used to find the appropriate size for this patient.
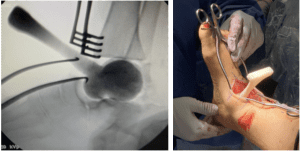
Intra-operative assessment of the talar trial sizers.
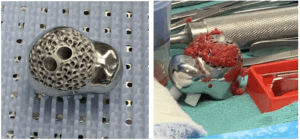
The final custom talar size was selected. Note the inferior surface of the implant which is pourous for ingrowth into the calcaneus and holes for screw accomidation to facilitate a subtalar joint fusion (left). The inferior aspect of the final talar implant was then packed with the autogenous proximal tibial bone graft (right).
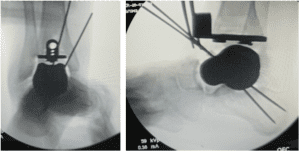
Next, the definitive talar component was pinned into the calcaneus through the custom screw holes. The tibial trial was placed into the joint and cortical coverage and size was assessed. The ankle joint was put through flexion and extension to allow the components to find their isometric position and the tibia sizer was pinned into place for preparation of the keel drilling for the final tibial implant.
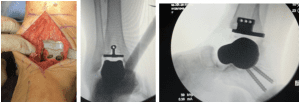
Final intraoperative image showing screws placed in the custom total talus replacement (left) and final fluoroscopic images after implantation.
Post-operative clinic images:
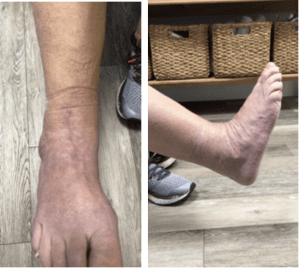
The patient is 6 months out from the procedure and ambulating pain free.
Post-operative X-rays:
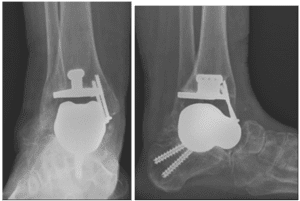
Final weightbearing films demonstrating excellent bone ingrowth and hindfoot correction.


